Please contact BISC IT for initial enrollment before using the instructions for Code42 CrashPlan. Follow the strategy below to protect your data. Code42 CrashPlan can help provide you with an offsite copy of your data.
CrashPlan licenses are for use on faculty/staff University-owned machines or faculty/staff machines being used for University business. You can install on up to four devices. Please read the instructions carefully to protect your backup.
Backup Strategy
Installation Instructions
- IMPORTANT: If this is your lab computer, you must use a separate private administrator account for your installation. If you install using your lab regular sign in, all the backups from different devices on your account will be accessible by everyone using the computer!
- Sign in to Code42 CrashPlan Console (https://console.us2.crashplan.com) using your UDel email address.
- You will be redirected to the UDel CAS Login page.
- In the top left area, move your cursor to the ADMINISTRATION drop down list and click Downloads.

- Download the Mac OS version and start the dmg installation package (typically saved to your Downloads directory).
- Click on Install Code42 and follow the installation prompts.
- Select Install for Everybody (all users)
- Code42 will start automatically after installation. It may take a short period for it to start. If it does not start, please start Code42 from the Applications.
- Sign in to Code42
- Username: enter your UDel email address
- Server Address: clients.us2.crashplan.com
- You will be redirected to the UDel CAS Login page on a web browser window. After signing in, you can close the web browser tab and go back to the Code42 application.
- If you have already added a device to backup, you will be prompted to Add New Device or Replace Existing.
- Choose Add New Device on a new device
- Add as new device: Click Yes
- Warning prompt (IMPORTANT: MUST COMPLETE STEPS BELOW)
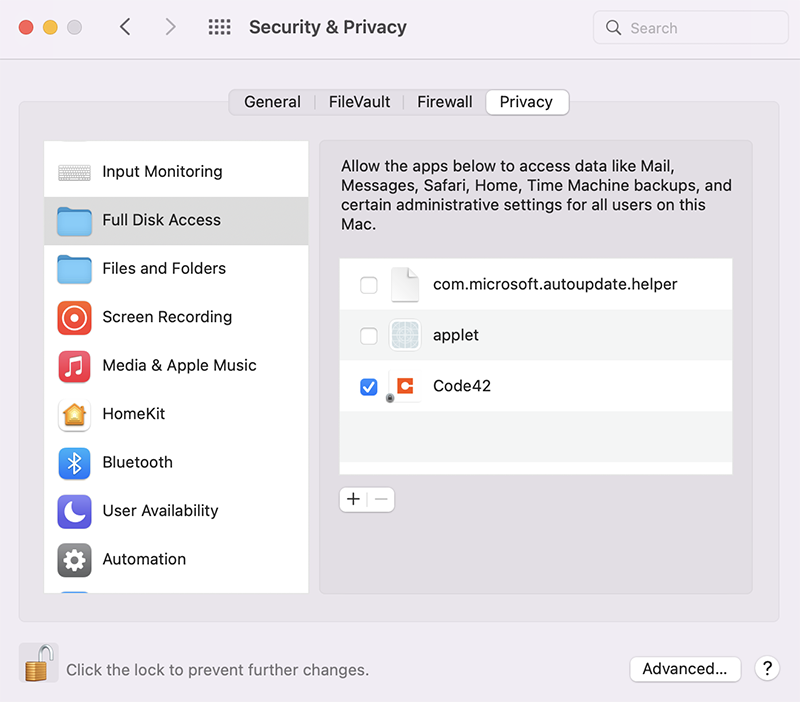
- Due to Apple privacy restrictions, Code42 cannot back up some files in locations like your Desktop, Documents, and Downloads, and from apps like Contacts, Photos, and Mail until you grant full disk access to Code42.
- Click Dismiss
- Open System Preferences > Security & Privacy
- Click on the Privacy tab
- Select Full Disk Access on the left pane
- Click on the lock icon to make changes
- Check Code42. Code42 should be listed already. If it is not listed, click on the + icon to add it from the macOS Applications
- Click Quit & Reopen
- Due to Apple privacy restrictions, Code42 cannot back up some files in locations like your Desktop, Documents, and Downloads, and from apps like Contacts, Photos, and Mail until you grant full disk access to Code42.
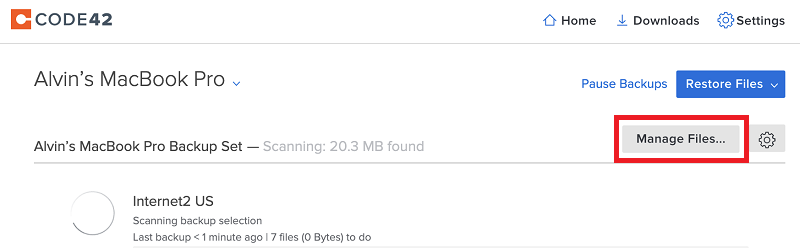
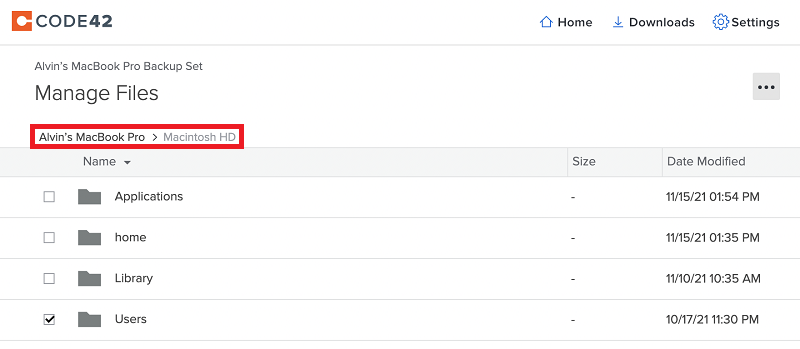
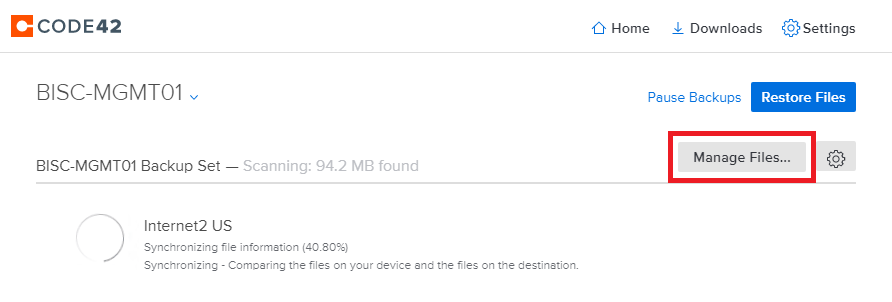
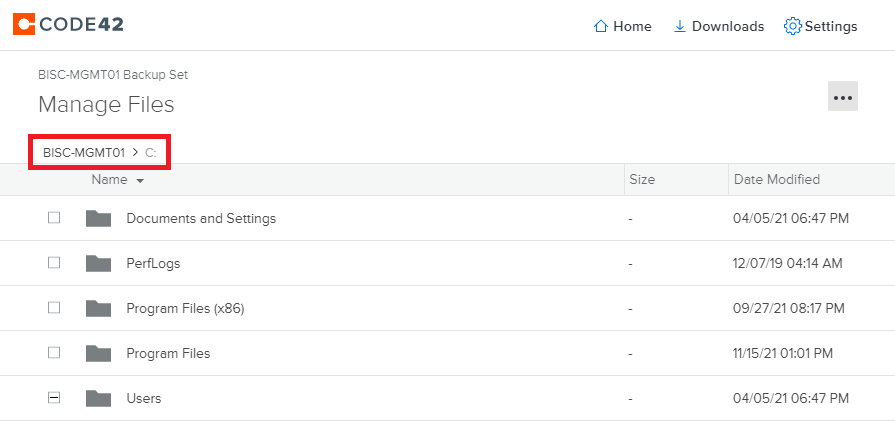
- CrashPlan will automatically select and backup the files in your user home directory. If you would like to backup other files and directories, click on the Manage Files… button. You can then browse the top level directory by navigating using the path shown. (see the red box in the picture below).
- WARNING: PROCEED CAREFULLY. If you unchecked your home directory by mistake, your files in your home directory will not be backed up.
- IMPORTANT: For lab computer installs, check the top level Users directory to backup all the user accounts on the computer.
- IMPORTANT: If this is your lab computer, you must use a separate private administrator account for your installation. If you install using your lab regular sign in, all the backups from different devices on your account will be accessible by everyone using the computer!
- Sign in to Code42 CrashPlan Console (https://console.us2.crashplan.com) using your UDel email address.
- You will be redirected to the UDel CAS Login page.
- In the top left area, move your cursor to the ADMINISTRATION drop down list and click Downloads.
- Download the Windows (64 bit) version and start the msi installation package (typically saved to your Downloads directory).
- Follow the installation prompts.
- Select Install for Everybody (all users)
- Code42 will automatically start after installation. It may take a short period for it to start. If it does not start, please start Code42 from the Windows Start Menu.
- Sign in to Code42
- Username: enter your UDel email address
- Server Address: clients.us2.crashplan.com
- You will be redirected to the UDel CAS Login page on a web browser window. After signing in, you can close the web browser tab and go back to the Code42 application.
- If you have already added a device to backup on a different computer, you will be prompted to Add New Device or Replace Existing.
- Choose Add New Device on a new device
- Add as new device: Click Yes
- CrashPlan will automatically select and backup the files in your user home directory. If you would like to backup other files and directories, click on the Manage Files… button. You can then browse the top level directory by navigating using the path shown. (see the red box in the picture below).
- WARNING: PROCEED CAREFULLY. If you unchecked your home directory by mistake, your files in your home directory will not be backed up.
- IMPORTANT: For lab computer installs, check the top level Users directory to backup all the user accounts on the computer.
This set of instructions are for Code42 CrashPlan that have been preinstalled on BISC computers. Follow these steps if you are notified by BISC IT to set up backup for your account.
- In the lower right corner of your desktop view, click on the up arrow icon near the time and date, and click on the Code42 CrashPlan icon.

- Click Sign in to Code42.
- Username: enter your UDel email address
- Server Address: clients.us2.crashplan.com
- You will be redirected to the UDel CAS Login page on a web browser window. After signing in, you can close the web browser tab and go back to the Code42 application. Be patient if you see a spinning wheel on the Code42 CrashPlan application.
- If you have already added a device to backup on a different computer, you will be prompted to Add New Device or Replace Existing.
- Choose Add New Device on a new device
- Add as new device: Click Yes
- You can close the Code42 app after all the steps are completed.
Restore
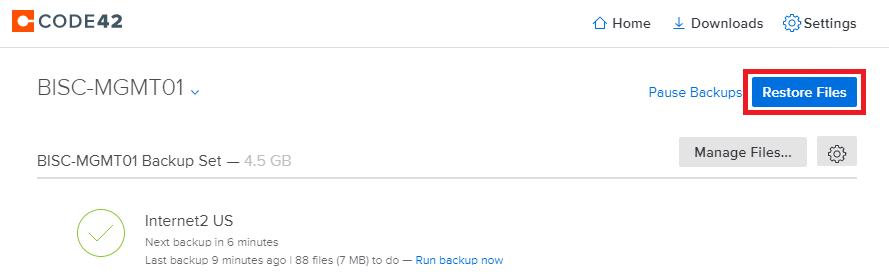
There are different ways to restore files as well as different situations to consider. If you are looking to restore a few small files, you can choose to download a zip file from the web console (currently limited to 250MB). If you are restoring a large number of files, Code42 CrashPlan recommends that you choose to Restore from the App. If your original device has crashed and you are recovering to a new device, please see the following Replace your device instructions on Code42’s website. Contact BISC IT for further assistance.
- Start the Code42 app.
- Click on the Restore Files button.
- Proceed to select the date and directories/files to restore. Click Restore Files… in the bottom right area.
- Restore File options. Choose where to save the restore files and other options.
- Click Go.
- Sign in to Code42 CrashPlan Console (https://console.us2.crashplan.com) using your UDel email address.
- You will be redirected to the UDel CAS Login page.
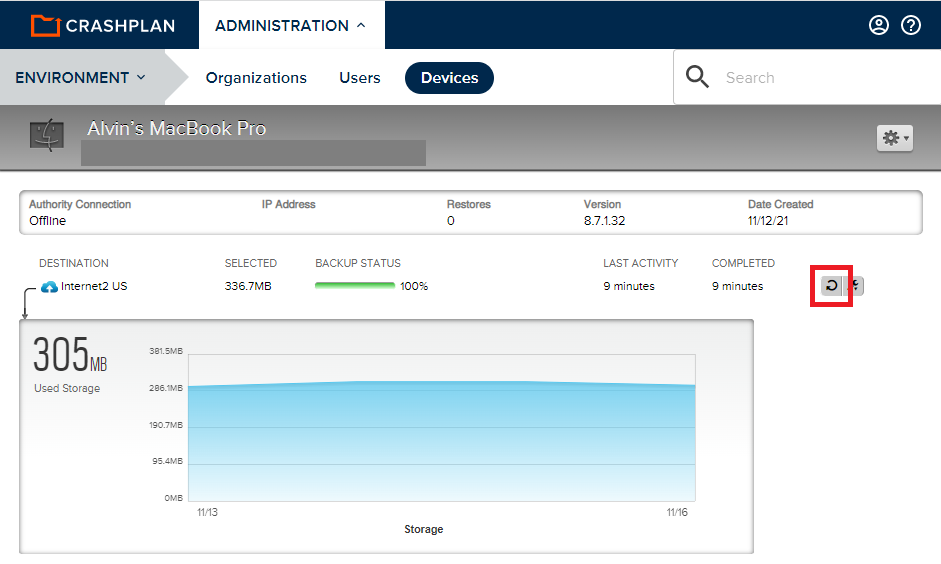
- In the top left area, move your cursor to the ADMINISTRATION drop down list and select Devices from the drop down list
- Click on the appropriate device name.
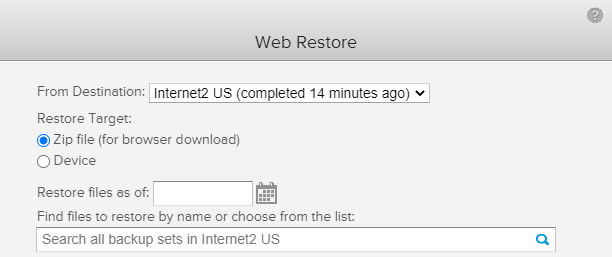
- Click on the ‘Restore’ button (see image below)
- Restore options
- From Destination: The cloud location should be selected automatically
- Restore Target options. Choose Zip file or Device.
- Device will allow you select a specific computer in your backup account to restore the files.
- Zip file will allow you to download from the web console.
- Proceed to select the date and directories/files to restore.